

Escape from Tarkov is a serious survival first-person shooter with a focus on immersion, authenticity and strategic gameplay. With each upgrade, the recreation expands, advertising untapped journeys and mechanics. One of the most challenging and fulfilling journeys from Tarkov to Elude is the Gunsmith Part 3 journey, which tasks you with collecting and customizing weapons to meet specific requirements.
In this direct, we’ll walk you through the Gunsmith Part 3, advertising experience on how to productively total the journey with the essentials and tools you need. Whether you’re modern on the diversion or prepared intelligent, this straightaway will aid you explore through this basic search.
What is Gunsmith Part 3?
A ride from Tarkov to Elude given by the Gunsmith Part 3 dealer technician. It centers on adjusting weapons to meet exceptionally specific prerequisites. The objective of Gunsmith Part 3 is to collect a weapon that matches the description of the quest request. These combinations are often imprecise and require a great understanding of the in-game gunnery system.
To make a total Gunsmith Part 3, you need to customize and adjust a weapon to meet the decisions set by the technician. These requirements vary based on the organization of the trip and may change slightly with each unused trip, but one thing is certain – it is a troublesome task that requires precision and patience.
Gunsmith Part 3 requirement
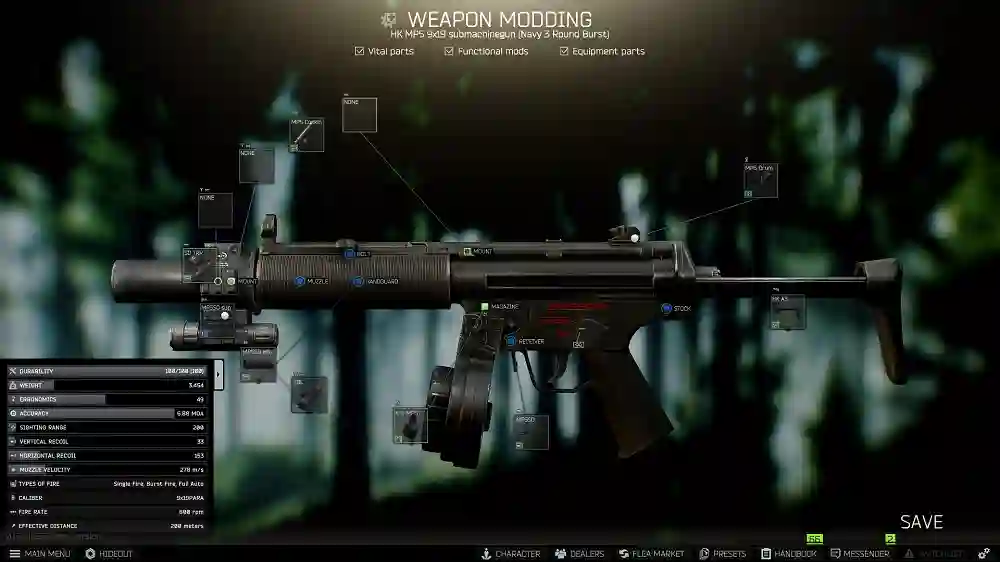
Before jumping into the specifics of how to modify your weapons, let’s take a look at the basic prerequisites for Gunsmith Part 3. For the task you need to take an M4A1 rifle and make some changes to its parts. Here are the key requirements:
- M4A1 rifle as base weapon.
- Attachments and modifications must conform to specified specifications for ergonomics, draw back and other execution metrics.
- Adjustments require certain weapon stats to be met to progress.
- You must ensure that the weapon has been fully assembled at some point in the recent submission.
In Gunsmith Part 3, you have to be careful about the changes you select. With that in mind, let’s dive deeper into each adjustment and how to select the right parts.
Breakdown of weapon changes for Gunsmith Part 3
1. Change the barrel
The barrel of the M4A1 plays an important role in the weapon’s general circulation. For the Gunsmith Part 3, you need a specific barrel that fits the required length and accuracy parameters. Consider barrel length, as it specifically affects the weapon’s draw back and ergonomics.
- Barrel Length: A longer barrel offers better accuracy but can cause a longer draw. Consistency is key to this quest.
- Muzzle Gadget: Select a gag that can reduce draw back and enhance the performance of your gun. Well-known choices for the M4A1 include AAC Power Outage or Gemtech G5.
2. Receiver
The receiver is another fundamental component of your weapon’s execution. This keeps all other parts in place and allows the weapon to function properly.
You must guarantee that the receiver fits the M4A1 model.
Pay attention to keeping the weight of the weapon low, as a heavy receiver can adversely affect your recoil.
3. Stock and buffer tubes
For the Gunsmith Part 3, you need to change the stock and buffer tubes. No doubt modifying the stock to increase ergonomics and reduce recoil.
- Ergonomics: Superior ergonomics improve your pointing and care of motion. The more ergonomic your rifle, the higher the performance.
- Recoil Diminution: One way good stocks and buffer tubes can reduce recoil is to reduce recoil, making your weapon less demanding to control in combat.
4. Handguard
An important adjustment for the M4A1 in Gunsmith Part 3 is the handguard. The handguard plays a major role in improving your accuracy and regaining control.
A key consideration is the compatibility of the handguard with other parts such as optics or vertical grips.
Look for a handguard with great draw back control highlights and ergonomics to make your weapon more manageable.
5. Gun grip
Your choice of gun grip can drastically affect how the weapon feels when fired. For the Gunsmith Part 3, you’ll need a hold that makes a difference with draw back control and ergonomics.
- Ergonomics: A more ergonomic feel will make your pointing more fluid, which is crucial in a firefight.
- Recoil Control: Select a type that minimizes draw back. Common choices for the M4A1 include the Magpul MOE and the BCM Gunfighter grip.
6. Optics and vision
The right optic or position can greatly advance your pointing and accuracy. For the Gunsmith Part 3, you need to select an optic that meets the travel requirements.
- Red Dab Sights: Consider Aimpoint Small Scale T-1 or EOTech sights, which are typically used for quick target acquisition.
- Scope: If needed, scopes like the Vortex Razor HD can be used for long-range engagements.
7. Rail system
When modifying the M4A1 for the Gunsmith Part 3, the rail framework will provide additional connection focus for decorations such as lasers, spotlights, and foregrips.
- Keymod or M-LOK frameworks are the most common choices.
- Make sure the rail structure underpins the ornamentation required for the search.
How is the total Gunsmith Part 3
Now that you know the general adjustments required for Gunsmith Part 3, let’s examine how to total the journey step by step.
Step 1: Get the M4A1
Start by collecting the M4A1 rifle. It can be acquired from dealers, looted in strikes or obtained through other players. The M4A1 is a flexible weapon and can be customized with a wide range of attachments, making it the ultimate choice for Gunsmith Part 3.
Step 2: Collect the required changes
Next, assemble all the necessary modifications for the M4A1. Some of these modifications can be strikes, acquired from dealers, or made in your safehouse. Be beyond suspicion to check the travel prerequisites carefully to keep a strategic distance from any mistakes.
Step 3: Collect Weapons
Once you have all the parts, it’s time to collect the M4A1. Go to the gunsmith interface and start adding the weapon parts one by one, making sure each modification meets the required specifications.
Step 4: Test the performance of the weapon
Before arming the workman, make sure to test the functionality of your weapon beyond any doubt. It should meet the required ergonomics and draw back to standards. If important, change parts until everything is perfect.
Step 5: Launch the weapon
Once you’ve completed assembly, go ahead and hand the adjusted weapon over to the technician. If everything fulfills the quest’s prerequisites, you get a total of Gunsmith Part 3 and get the reward.
Simple botch on Gunsmith Part 3
While completing Gunsmith Part 3, players often make a few simple botches that delay their progress or frustrate them to complete the journey. Here are a few things to note:
- Wrong connection: Be careful about choosing an off-base barrel or gag gadget. Guarantee that all modifications are compatible with the M4A1.
- Misunderstanding the requirements: The journey can be confusing and it is easy to overlook a certain prerequisite such as a certain draw back or ergonomics respect. Double check the journey diagram to keep a strategic distance from any problems.
- Not checking the weapon: After completing the adjustment, constantly check your weapon. You don’t need to give weapons that don’t meet the required specs.
Conclusion
Gunsmith Part 3 is another challenging journey from Tarkov to Elude, requiring you to collect a deeply customized weapon that meets special requirements. It tests your knowledge of the game’s weapon structure and empowers you to consider the details. By following these straightforward steps and tips, you should be well on your way to completing your journey and earning lucrative rewards from the mechanic.
Remember, persistence and accuracy are key in completing Gunsmith Part 3. With the right adjustments and precautions, you’ll be up and running on this journey before long and encouraged from Tarkov to Elude.